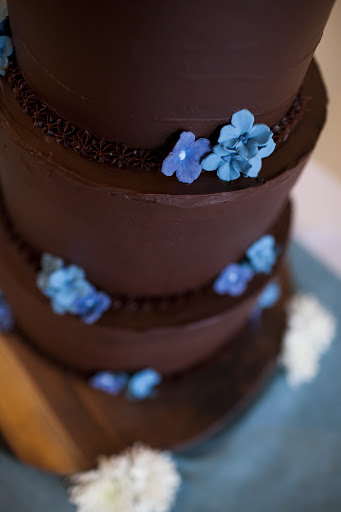
- Photo credit Kristoffer Triplaar
A dear friend is getting married. Said friend asks you to bake her wedding cake. In a fit of bravado (or madness) you say, “Of course!” After all, you can bake pretty well. And lots of people have done it, right? How hard can it be?
Well … we’re not going to lie. It is kinda hard. But if you’re committed and meticulous, you can absolutely bake a wedding cake. And if you’ve already mastered layer cakes, you may not find it particularly difficult at all — just a lot more time-consuming.
Now, I thought myself a pretty solid baker before taking on this project with the bride, my dear friend Julia, last winter. My cakes had always turned out pretty well. But the level of precision required to turn out a beautiful, tasty, upright wedding cake put all my previous efforts to shame.
You have to measure ingredients precisely. You need to really get to know your oven and monitor temperatures closely. You need to buy tools (luckily, pretty inexpensive ones) that you probably didn’t know existed. You have to plan ahead. You have to eat a lot of practice cake (oh, darn). You have to learn not to panic.
Julia and I learned all those things — the hard way, in some cases — and pulled off a spectacular and stunning three-tier cake. Chocolate with chocolate buttercream frosting, with salted peanut butter frosting between the inner layers (each round tier made up of three layers: 8, 10 and 12 inches). And while I’m a pretty modest person at heart, I am unabashedly proud of that cake.
To be clear, we’re not going to attempt to teach you how to make a wedding cake with this post. There are tons of books and resources out there to walk you through it; we particularly liked Wedding Cakes You Can Make: Designing, Baking and Making the Perfect Wedding Cakeand Sky High: Irresistible Triple-Layer Cakes, the source of our chocolate batter recipe (we cobbled our frostings together from a few different sources). And we relied heavily on Deb Perelmen’s experience, chronicled in multiple posts over at Smitten Kitchen, as well as the great tips in the readers’ comments.
Instead, we’re going to share things we wish we had understood better when we started that make planning and execution a bit smoother.
And before we start, just because it can be confusing: Below we’ll refer to layers, when talking about baking, and tiers when talking about cake construction. A wedding cake is made up of multiple tiers of different sizes. A single tier is made up of multiple layers.
Ready? Here goes!
Find A Recipe — For The Right Sized-Cake
Naturally, pans of different sizes have different volumes, and round and square pans do, too. Julia and I made things hard for ourselves by baking a square cake recipe in a round pan. We’re warned against trying to fit square pegs in round holes for a reason, folks. It worked, but it involved a lot of confusing conversion calculations that just made things harder than they needed to be. Do yourself a favor and find a recipe for a cake of the shape and sizes you want.
Know Your Oven
If you don’t already own an oven thermometer, get one. A five- or 10-degree difference turns out to be a big deal. It can make your cake lopsided, fall, undercook, overcook — all bad news for making a perfect cake. You’ll never know if and how much you need to adjust your temperature settings without one of these babies.
Get A Kitchen Scale, And Use It
You want each of your layers in each tier to be exactly the same, which means you need to weigh your ingredients rather than rely on the standard “cup” measurements. If your recipe is written in cups, measure every ingredient out, weigh it and write it down on your recipe (and don’t forget to tare your receptacle!). Those measures will ensure that every single layer you bake contains precisely the same amount of every ingredient. We found it easiest to weigh in grams.
This is no secret — any book or source you find will tell you this — but it bears repeating. No matter how good a baker you are, your wedding cake should notbe the first multi-layer, multi-tier cake you’ve ever made. You’ll learn things you need to know only by doing it ahead of time. Plus, bonus! You’ll have lots of extra cake to eat and share (and your friends, neighbors and/or colleagues will love you).
Freeze, Freeze, Freeze! Really!
This will save you tons of time, by letting you chip away at your layers in advance. Yes, it may sound nuts to freeze your layers ahead of time. We didn’t believe it, either. But it’s true: if you wrap your layers individually in plastic wrap (use lots!), after each one is completely cooled, it will taste and feel delicious. No one will know. And when it’s time to construct your tiers, you’ll find the layers are much easier to work with when they’re still a bit cold.
You should also experiment with freezing your frosting. I tested this with our practice cake and our chocolate buttercream frosting, and once thawed, it was perfect. This probably won’t work with all recipes, but it’s worth trying out. Making a wedding cake’s worth of frosting in advance is a huge time-saver.
Get Some Tools
These are pretty basic cake-baking tools, but we didn’t know about many of them before we started.
Flower nails: More nail than flower, these little guys are about an inch long but with a fat head, a bit bigger than a quarter. They’re essential for the even rising and baking of larger cake layers because they conduct and distribute heat through what would otherwise come out as a gooey, undercooked center. When we forgot to use them, our layers weren’t too pretty. (Not that we didn’t enjoy eating them!)
Cake strips: Partner-in-crime to the flower nail, a cake strip is about an inch wide and comes in various lengths. It insulates your large cakes so that the edges don’t burn while the center is still firming up. You soak it in water, wrap it around the outside edge of the pan, and pin it in place. Magic! We didn’t know about these. YOU WANT THESE.
Parchment Paper: You may already stock this in your kitchen, but if not, we recommend it highly for keeping the cakes intact as you coax them out of the pans. We buttered the bottom of the pan; cut parchment paper in the shape and size of the pan; stuck the flower nail through the center of the parchment paper so that the flat side of the nail head was down and the nail part pointed up. Then we buttered the top of the parchment paper, the sides of the pan, and the flower nail.
Cardboard cake rounds: These come pre-made in all sizes and they’re essential for making layer cakes. 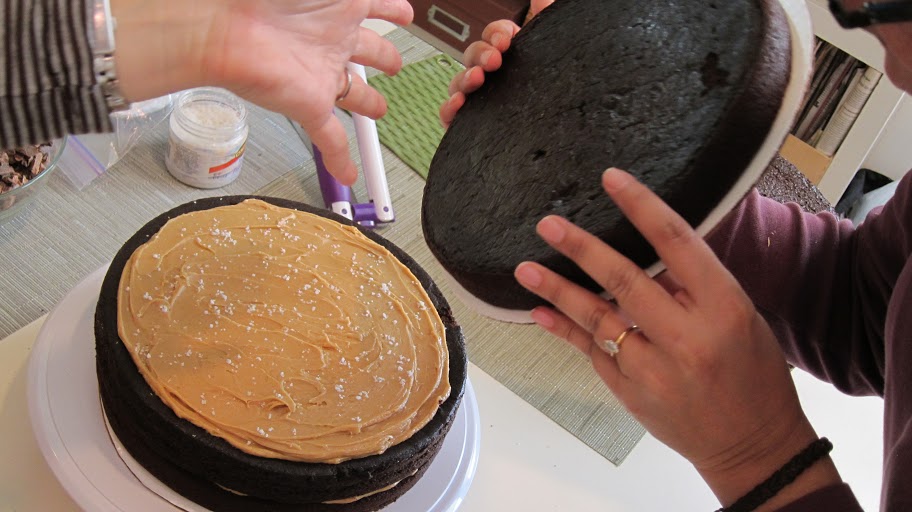 Here’s why:
- They keep each layer nice and tidy for freezing, and enhance maneuverability when you pull all the layers out for thawing, frosting and assembly on the big day.
- After all the pretty photos are taken and the ceremonial first slice is cut, wedding cakes are whisked away and disassembled into their individual tiers before slicing. You want the bottom of each tier to retain its cardboard round as you stack it on the tier below, so that each tier can be “easily” un-stacked. (This is actually a little stressful, but with a steady hand and a spatula, it works!)
- As for how to use them: After the cake pan comes out of the oven and cools for 10 minutes on a wire rack, put the cake round over the top of the cake (you may want to poke a hole in the center of the cardboard to accommodate the tip of the flower nail). Then place your cooling rack over the cardboard round and deftly flip the cake! With the pan now upside down on the wire rack, shimmy the pan off carefully, remove the parchment paper and the flower nail, and allow your cake to cool completely before wrapping it in a million layers of saran wrap and foil for freezing.
- If you’ve done this, each layer will be on a cake round when you start constructing your tiers. You’ll need to toss all but one of the rounds, because you want only one round per tier: on the bottom, like this. So when you thaw the layers for your tier, keep the cardboard round on one of them. To remove the cake rounds from the other layers, use dental floss or fishing line held taut between your fingers to saw along the bottom of the cake.
Turntable: You’ll wonder how you ever frosted a cake before owning this wondrous gadget. With the right frosting tools, the turntable helps you get an even finish on the sides, top and edge of your cake tiers.
- Hint: we frosted each multi-layered tier separately on the turntable, and transported the tiers to the venue separately before stacking them. This required us to take a bit of frosting, frosting bags and the “long dowel” (see below) to the venue, because you’ll want to plug up the unsightly gap between the tiers with some sort of decorative frosting technique.
- Hint: Bring extra frosting to the venue with you – when you’re disassembling the tiers, the upper tier is likely to take some of the frosting off the top of the tier below it. You can use your extra frosting to “patch” up the top.
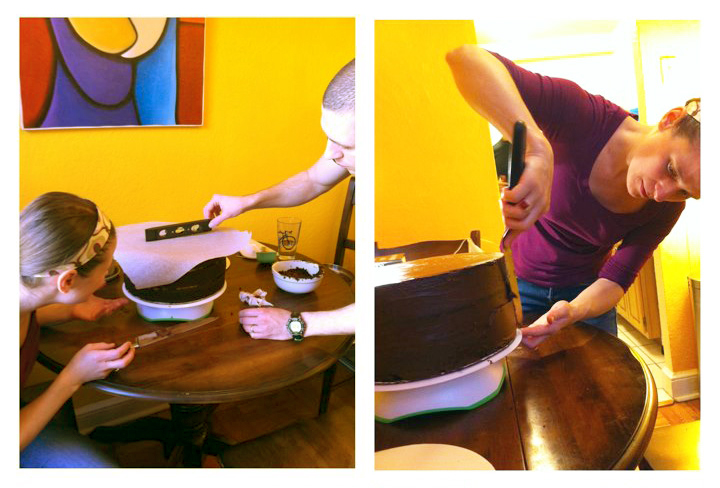 Frosting Tools: If you’re using a buttercream frosting, get some nice flat metal spatulas in a couple of sizes, and a plastic tool with a straight or a comb edge, depending on the look you’re going for. You’ll want to get some frosting bags and tips to do some piping — if not on the edge or top of the cake, then to seam up the tiers. If you don’t want to use frosting to seam the tiers, you may be able to get away with using another kind of decoration, like edible cake decorating pearls or gum paste decorations, etc. (we bought the gum paste flowers you see on this cake from an Etsy vendor). If you want to frost your cake with fondant, well, that’s a beast we know nothing about!
Wooden Dowel Rods: Inserting several of these into each tier helps support the tier that sits on top of it. (Tiers are heavy!) You’ll need them for every tier except the top tier (unlike the lower tiers, it’s not supporting anything). Working with them is not as mysterious as it sounds:
- When your bottom-most tier is all frosted and ready to go, take the next biggest pan, turn it upside down, and smush it ever so gently into the frosting right in the center. This marks your target for laying down the next tier (it will give you an outline that looks like this).
- Then take a dowel and push it down into the center of your cake. Mark where it meets the top of the cake with a pen, then remove the dowel and cut it at your mark. Then cut four or five more to exactly the same length. Then insert your cut dowels into the cake – one at the center, and the rest an inch or so inside the perimiter of the “pan marking” you made in the frosting. It’s important all your dowels are the same length – this will help keep the tier above level.
- You do not insert any small dowels into the top tier. Remember, it’s not supporting anything above it.
- When you finally assemble all your tiers, you will take one very long dowel and cut it at the height of your fully assembled cake. Sharpen one end and slowly insert it, from the top, through the entire masterpiece. It really does work — gently turn it as you push it through each of the cardboard rounds separating the tiers. Cover the tiny hole in the top of your cake with frosting and/or your cake topper!
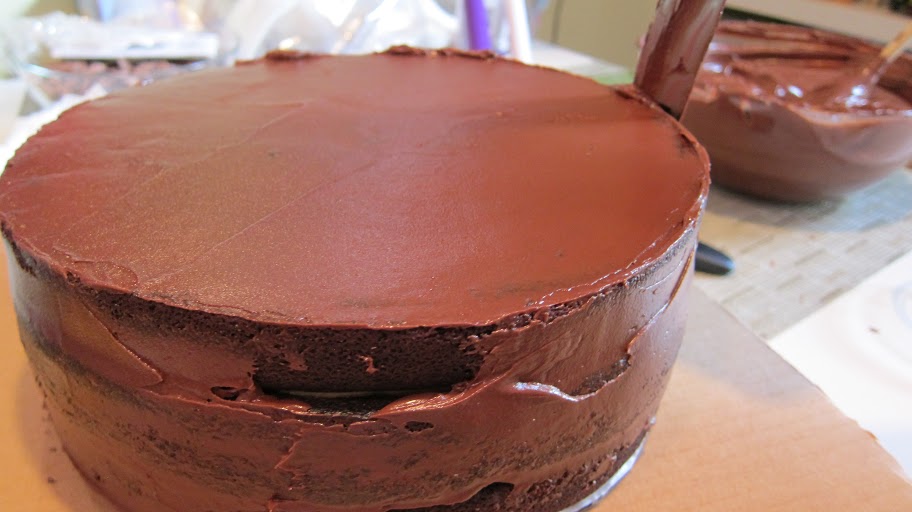
A crumb coat is a first, thin layer of frosting applied to your assembled tier before the final coat. It’s a bit like a primer on your wall — it catches all those imperfections and pesky crumbs that would otherwise end up marring your lovely frosting.
Doing this takes some time — not because spreading a thin, imperfect layer of frosting on a tier is time-consuming (it’s not), but because you have to pop the crumb-coated tiers into the fridge for a an hour or so. You may think you can skip this step. You can’t. You’re making a wedding cake, for crying out loud — don’t skimp on such a simple step that makes a dramatic difference in how your cake will look. Read the crumb coat instructions in your book and follow them. Trust us.
Ending Up With An Upright Cake
To get your cake straight, you want every layer, and the top of each tier, to be as flat as possible. There’s nothing wrong with a slightly leaning cake, mind you. And if you do end up with a slightly off-kilter one, you position your cake so that the tippy side is less visible. But taking the time to get all components of the cake as flat as possible will be a big help. We managed to nail it (after a somewhat leaning practice cake); here’s how:
First: make sure you’re oven temperature is correct and steady. See “Know Your Oven” above.
Second: bake your layers one at a time. See “Other Invaluable Things We Learned” below.
Third: Level your baked layers. You can use a cake leveler, but word to the wise: Wilton’s Large Folding Cake Leveler didn’t work for us at all. The blade was too flimsy. So I did it by hand with a long, very sharp knife. It’s time consuming to meticulously level nine cake layers by hand, but you can nail this by checking your work with a carpenter’s level. If you really take the time to do this well, you’ll end up with flat tiers and a flat cake.
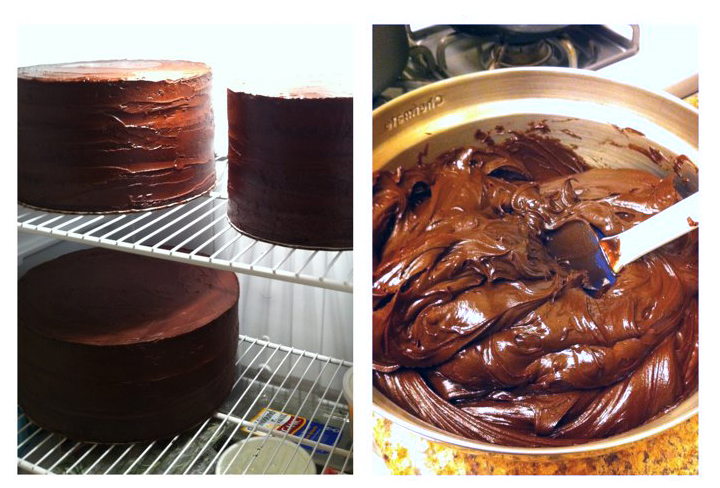 (Months after this cake was history, we had much better results, albeit on a 10-inch cake, with the Kaiser Bakeware Patisserie One Wire Layered Cake Cutter. We also found an as-yet unreviewed, non-folding 12-inch wire leveler on Amazon called the “Fat Daddio’s 12” Cake Leveler Trimmer.” It looks similar to the leveler that did work for us, but having not tried it, we can’t speak to how it works.)
Some Other Invaluable Things We Learned:
Bake each layer one at a time. Lots of folks bake more than one layer in their oven at once. And if you have a very large oven, this may work for you. But we found that 1) it threw the baking times off, and 2) required opening the oven during baking to move the pans around, which made some of our practice layers fall.
This presented a problem for us: Our recipe called for us to mix one huge bowl of batter for all three layers of our tier at one time. It assumed we would mix the batter, divide it among three pans and then bake all three simultaneously. Difficulty is, you want to mix your batter and fill your cake pan right before you pop it in the oven. If you let it sit around, all sorts of science starts happening that you don’t want to happen too far in advance of baking.
So, if you want to bake your layers one at a time, but your recipe offers just one set of measures for multiple layers (assuming you will divide the mixed batter among several pans at once), you’ll have to do some math. We had to divide our recipe in three, then mix each layer separately. Here’s where your kitchen scale is invaluable, once again. To calculate the correct measures of ingredients for each layer, we weighed out every ingredient on our kitchen scale (in grams), then divided by three.
It’s a labor of love, people.
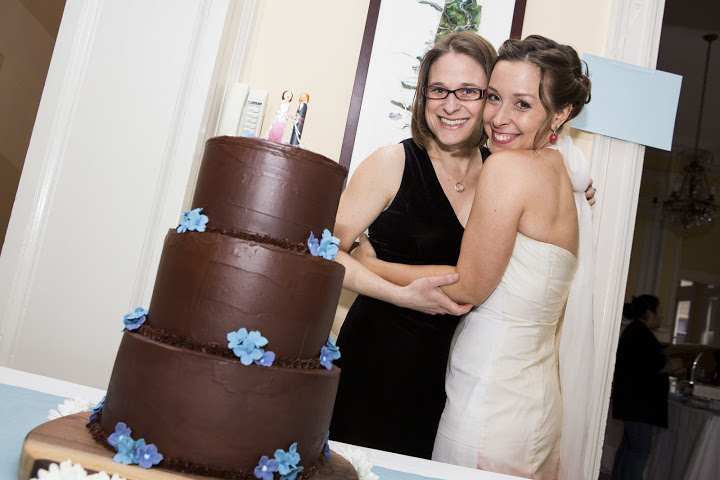
- Photo credit Kristoffer Triplaar
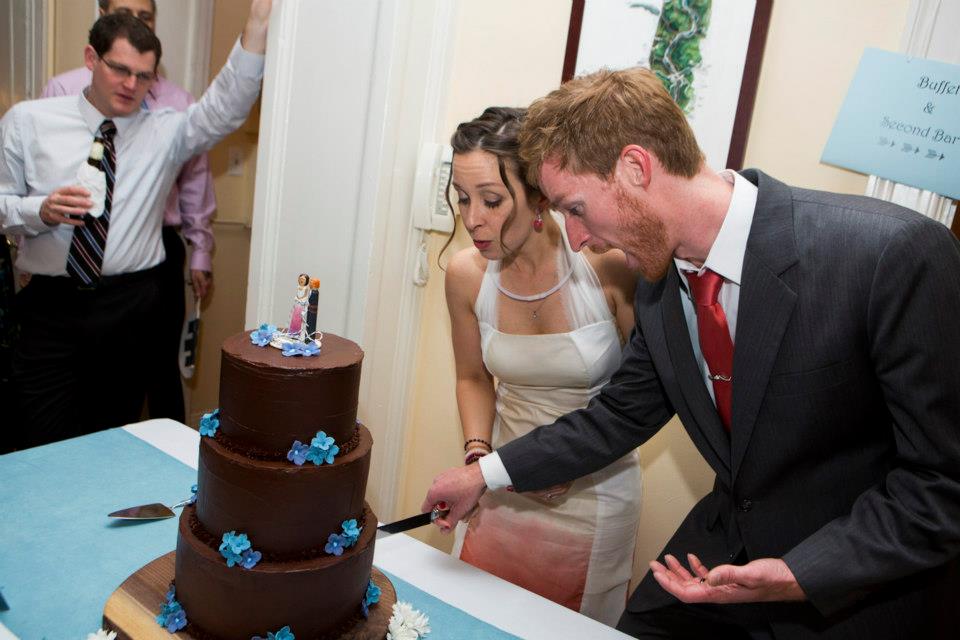
- Photo credit Kristoffer Triplaar
You don’t need a fancy kitchen or a beautiful oven to pull all this off — we have teeny, tiny urban kitchens. And you can use an expensive stand mixer or a basic electric hand mixer; we used both for different layers and found it didn’t make a difference — although the stand mixer was helpful for the frosting.
Finally, this is an all-hands-on-deck project. Enlist your friends! Other hands and eyes come in handy for flipping, eyeing whether the layers are flat and the tiers are straight. Shazia helped us construct our practice cake and Jenny made the finished product gorgeous with her talented eye for the right placement of the gum paste flowers.
If you’re still with us, you’re hard core — you’re totally going to rock this wedding cake. And if we can do it, you can, too! Good luck!

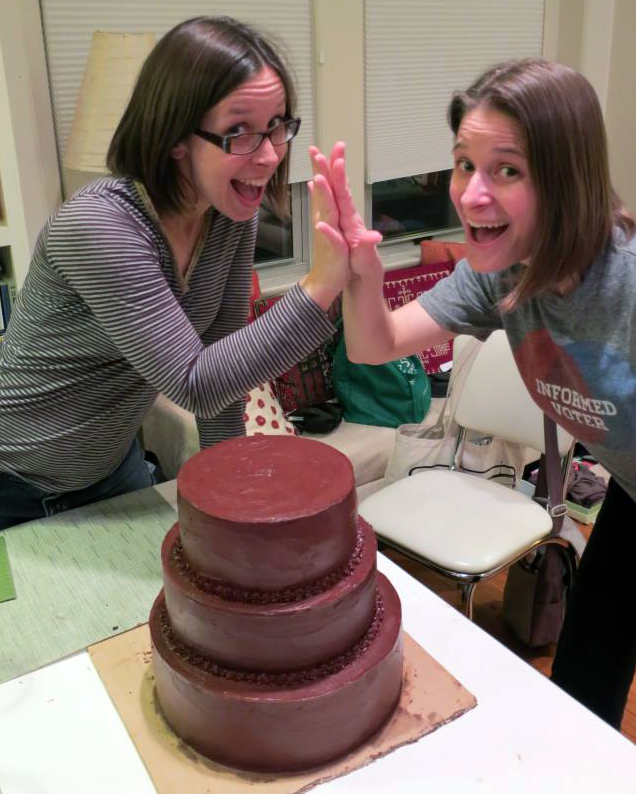


Not only was it “a spectacular and stunning three-tier cake,” it was also delicious!
Thankfully, I got a taste of the test batches … And even I dream of that cake!
Anyone who knows the answer id love a response. I have made a few wedding cakes and am doing a naked cake for this next wedding… I love freezing and crumb layering otherwise. For a naked cake, can I still freeze the layers? Will this make a difference?
I still dream about that cake, too. We kept all the “failed” practice layers in the freezer and munched on them for quite a while; it was a bit heartbreaking when they were all gone 🙁
Thank you so much for this information! I got my self into a wedding cake deal and I’m nervous! Your post has helped me a lot! I feel better now.
This is invaluable information! I just got word that my wedding cake maker is stuck in Canada and I may need to make my own cake if she cannot get her passport rushed fast enough and get back to MD.
My son who loves to cook and has worked in the restaurant industry since high school (about 5 years)is going to have to help me make my own wedding cake if our baker does not return in time for my wedding on August 2nd.
I guess I will be going to the restaurant supply store on Monday. Thanks for the great info of what to do and I am sure we’ll start baking this week.
L-
I’m so glad, Rita! You can do it — you really can. But if it makes you feel better, I panicked pretty much the entire time. Practice, practice. And if you have questions as you go along, I’m happy to answer them here. Good luck!
This post was a tremendous help. A “practice” 14″ round is in the oven right now…I’m doing the base for a wedding cake (the top tier is being flown in from a bakery in Chicago, it’s the groom’s fav). I have all my equipment, and weighed all my ingredients. I’m a little nervous but you girls made me confident!!! I think I can do this!!!!
You can, Donna! We were terrified. And frankly, our complete practice cake wasn’t perfect. It would have done the job, but it was a little lean-to. Our next round was even better.
So even if you’re not thrilled with your first practice layers, you can always give it another go. Weighing your ingredients so you’re always consistent, room-temp eggs, un-expired soda and/or baking powder, and having an oven temperature you can trust are the main things you need.
Let me know how it goes! Good luck!!!
Hi there, why do all the pan sets come in singles – I never thought it through and just bought and I need double sandwich layers for something I want to do for a birthday this weekend. Heart shaped. SO, i bought a SET and it’s one of each size only. Now I reckon I have to go and buy singles rather and 2 of each? is that how it works? Thank you so much. Lovely stuff.
First practice came out wonderful!!! I gave it to my girlfriend for her birthday (which involved ta practice transport) and she shared it with her mom at the senior center…it was a big hit. Today another practice…2, 14″ round layers filled with chocolate buttercream. The base layer was easy. Moving the top layer onto the bottom layer a little scary but I did it!!! I crumb-coated it and now it’s in the fridge. Next is my Swiss meringue buttercream final frosting and decorating. I feel confident now. Can’t thank you girls enough…all your tips helped enormously.
So glad to hear you’re finding our post helpful! Your cake sounds delicious and I’m sure it will look gorgeous. Post again when it’s all said and done to let us know how it came out!
The cake looks beautiful and this post was really helpful! I’m trying to plan out a first-time wedding cake now, and I’m curious what height cake/pans you used? Did you use 3 2″ layers for each tier? What was the final height of each tier? I really like the proportions of your cake! Thanks!
This cake looks gorgeous..Great useful tips..Thanks.
Hi you doing lady’s thank you for the information i took notes my ? is do you have to always cut each layer or can i take them out the pan and build them.
I’m sorry, TG — I missed your question! But if it’s still useful, the pans were 2 inches high, and we did three layers per tier. The finished, frosted cake, if I remember correctly, was 18 inches tall. That’s because not all of the final layers were exactly 2 inches high, and we had to shave some off the top of several layers to make them completely flat/even. If every one of your layers was perfectly 2 inches high, I would guess your frosted, final cake would end up close to 20 inches tall?
Again, I’m sorry I missed your question! I realize you’re probably much further along in your project at this point!
And Rita, if you see this, please do let us know how it went!
This is just the post I need. Was enlisted to bake a wedding cake this December. I’m an amateur home baker and have been baking for years but this will be my first wedding cake. It’s both scary and exciting, so stories like these are really a big confidence booster. Hurrah! Would you mind sharing your recipes for the cake, frosting and filling? They really look yummy. Thanks in advance 😉
Can’t wait to hear how it turns out!
I did it!!! The cake was a huge success and I couldn’t have done it without this truly helpful post. I have a pic trying to figure out how to post it!!
We love hearing this! Good for you, Donna!
What kind of pans did you use? How much inches?
Hi, Christine. Did you see April’s earlier comment about size: The pans were 2 inches high, and we did three layers per tier. The finished, frosted cake, if I remember correctly, was 18 inches tall.
I love the presentation of the step by step way the cake was made even with the crumb coat. I love how smooth the top was done. Sometimes my cakes come out slanted on top. Not sure why 🙁 but well done! The cake looked awesome! I bet it tasted awesome too!
Hi, Valinda — Thank you so much for the great feedback! I’m sorry I didn’t see it sooner; comments keep ending up in my spam filter!
If it makes you feel better, our cakes were only completely flat on top because we did a lot of manual even-ing with a long knife. We actually tried two different brands of cake levelers on our practice layers, but we found neither of them gave us great results. So out came the knife! It was slow going, but it worked!
Other things that helped with more even tops are the cake strips we mentioned, and dropping the temperature of the oven by 25 degrees. The only challenge with that second technique is that you have to lengthen the baking time slightly.
Thanks again for reading!
Thanks for this post. It’s the first thing I’ve read. I really can’t believe that I have the priveledge of making my daughter’s wedding cake, and I’ve never made one but I love baking, and with your tips, I am really hoping that my practices will turn into a sucess.
Thanks again for the direction.
Oh, Rhonda! This is great! Best of luck. Send us pics of how it turns out!
Hi, I have my first wedding cake order next month. Should I trim or shave off the sides (edges) of the cake to make perfectly straight? Or can I just add more frosting wherever I need to make the edges straight? Please help. Thanks
Hi, Michelle. First, each tier: If all your layers for your tier are the same size — baked in the same pan — there shouldn’t be much need to shave from the sides of each tier. They may be slightly uneven on the sides when you stack them, but not enough that your frosting shouldn’t cover it up. And you can slide the layers around a tiny bit while stacking them to make the sides as even as possible.
Now, if you’re talking about keeping the entire cake (all your tiers stacked on each other) from leaning, that’s a trickier thing, and trying to shave the sides to compensate for any leaning sounds very tricky. A straight cake relies, in large part, on tiers with flat tops. In some cases, we shaved off the slightest bit of the tops of the tiers to make them as flat as we could (and, as noted, we used a level to be sure). But honestly, a homemade cake is a homemade cake, and that’s part of the charm. There’s nothing wrong with a slightly leaning cake, and you can always turn it on the table so any lean is less visible. No one will notice!
Good luck!
Good luck, Rhonda! Please let us know how it goes!
And Donna, if you see this, well done! I’m so glad it turned out so well. I hope the wedding was fantastic!
I have the recipe I want to use for the layers, it makes 2 9″ cakes nicely. What I will be making is, 2 12″, 2 10″ 2 8″ and 2 6 ” layers for the cake I am building. Can you recommend an online calculator I can use to figure out how to prepare the correct amount of batter for the different pan sizes.
I hate to say this, Hanna, but I can’t remember what we used to guide our conversions. I do remember that we ended up doing a lot of math to ensure we were scaling each ingredient correctly for each of the pan sizes.
That said, this looks like a good resource: http://www.joyofbaking.com/PanSizes.html
And the table at the end of this post may be just the thing (and note, too, the table right above it — you’ll also need to adjust your baking times): http://www.sweet2eatbaking.com/conversion-guide/
Good luck!
I was wondering how long it takes for the cakes to fully thaw? If the wedding were on a Friday would they be taken out on Wednesday or Thursday?
Hi, Tammy, It doesn’t take long for layers to thaw — depending on the size and thickness, it will likely only take an hour or two. For the Saturday evening wedding, we thawed our layers about an hour or so on Friday (leave them wrapped in your plastic wrap) before we assembled each tier. By the time you’re working on your crumb coat for the tier, the layers will be thawed. We then popped each frosted tier in the fridge Friday, and assembled the tiers into the complete cake on Saturday. I hope that helps!
I absolutely loved reading this post. I too, got myself locked into making my friends tropical tasting, coastal decor wedding cake. This will be my first and I’m very nervous. I have the finished product in my head and it is just gorgeous. Your post was extremely helpful and very detailed. Thank you and I can’t wait to just start it and applying all your techniques. The only thing I’m a little uncertain of is transporting the cake to the venue and finishing it there. Nerves…..
We’re so glad it was helpful, Marcie! Even after all the reading we did before getting started, we still had lots of questions, particularly once we started baking. We wrote this post hoping to fill in some of those little gaps. Remember … practice, practice!
It’s true — moving a cake is nerve-wracking! We were terrified at the idea, so we decided not to try it. Instead, we transported the frosted tiers to the venue and assembled the cake on-site. That’s not always possible, of course, but if it’s an option for you, that might alleviate some of those jitters. Just remember you’ll need to bring all your frosting and frosting tools to the venue with you.
Good luck! Let us know how it goes, or if you have any other questions along the way!
hi can i ask you what size tins you used for each cake and what height should each cake be.thank you for your time/
hi there, your cake looked delicious. And fabulous along with straight and even. Just so you know, a flower nail is for making icing flowers, like roses etc. not for an even baking tool. But hey, if it worked for you then maybe I should give it a try. You made me smile. And btw, your cake looked like a professional did it congratulations.
Cheers,
Wendy
Long time baker of wedding cakes and other family goodies.
I take it back, I just read a blog where a gal uses one sometimes three in bigger cakes. She swears by them. Too funny. Well, I am on round three of a four layer wedding cake, I am going to try it out. Thanks for the advice. Take care. Wendy
You go, Wendy! We’d love to see pics of your finished work! Thank you for the comments.
I missed this over the summer, Wendy, but thanks so much for your nice comments! We were thrown by the flower nail suggestion when we first stumbled on it, too, but when we kept seeing it pop up we decided there must be something to it. I am in awe of you for baking a four-layer cake — I’m sure everyone loved it!
I am making my first ever wedding cake for a cousin’s wedding in 3 weeks’ time and so glad to have found this site. I’ve been trying out recipes and currently actively baking practice cakes. It will be a three tier wedding cake with different flavors for each tier. Wish me luck!
Good luck Mel! Please let us know how it turns out. Share a picture with us on Facebook – We The Eaters! We wish you all the best!
You’ll be fantastic, Mel! Good on you for all the planning and practice. Good luck!!!
I’m planning to bake my own wedding cake, I get married in 15 days, i haven’t practiced!!!! thankfully I have everything but the turntable and the dowel rods, this post is amazing, thank you.
Wish me luck!
Just fit in a trial run (or two!) before the big day and you’ll be fine! Congrats!
I’ve been meaning to let you know that my first wedding cake that I baked for a cousin’s wedding was a success. I will share the picture on your FB page.
Mel! Your cake looks absolutely *amazing*!!!! Congratulations, and well done! If you have any tips for other bakers, please feel free to share them here 🙂
Hi there may I say well done not only for the cake but for your fantastic information of everything you need yo know in the making of the Wedding Cake. The exact thing happened to me my best friend had a daughter getting married and she asked if I would make one. I managed it with the help of my wonderful daughter in law to be as she is a great cup cake maker. My friend has now asked to to make her Wedding Cake in February for a March Wedding and her son is getting married next year, whom I expect will ask me to make theirs. You are right it is a very hard thing to do and a lot of work as you rightly say, I don’t mind the work but I couldn’t do it on a regular basis it’s to stressful for me. i had searched the Website for the perfect Wedding Cake mixture and found an American one.
It was the most moist and beautiful tasting cake. However, when cooked it had streaks in the cooked cake, which looked like it hadn’t cooked through in parts, although it didn’t taste like that I was not happy so I made another ( turned out the same) all I could think of is that because it was a moist cake it and a lot of weight due to size it was that but I thought it looked an unprofessional mixture when cooked. All this to ask if you have a full proof Wedding cake recipe that you could send me please please please !!!!! Also for the icing (butter icing) Inwould be so grateful and relieve a lot of stress for me. I thank you for your time in reading my long message I also thank you for your fabulous tips congratulations to you both.
I’m so sorry I missed this kind comment, Pamela! Unfortunately, though, I really don’t have a foolproof recipe to offer. I love the cake we baked, but if I were to do it again, I would certainly pick one for the size and shape we wanted, rather than the retrofitting we did. But at this point, I’m sure you found a recipe you were happy with — and have surely made and served the cake by now! For what it’s worth, for the chocolate frosting, I used the Cooks Illustrated recipe for milk chocolate frosting (though we used semisweet, rather than milk, chocolate) that accompanies their “Fluffy Yellow Layer Cake” recipe. It has a bit of corn syrup in it to keep it a little glossy.
I agree on the stress level. It’s a lot of pressure, and for the past couple of years I couldn’t imagine ever doing it again. I’m a bit more open to the notion now 🙂
I apologize again I missed your message, and wasn’t able to help with recipes in time. I hope all went well and you were thrilled with your results! Please let us know how it all turned out.
Thank you so much for this information! I accidentally said yes to making a wedding cake. I must have been distracted by my crazy life at the time!! I make lots cupcakes and a couple of layer cakes for anniversaries. Cupcakes, I got that down, but this wedding cake…scary. It’s a naked cake to make matters worse. Now that I’ve cried a little and possibly had a cocktail or two, I am ready to begin figuring this out. ☺ Thank you for posting this. I didn’t know about flower nail and many other tips. Your cake was beautiful! Thanks again. Happy Caking!!
Thanks so much, Huneybee! I had never done anything like it before, either, so I know you can do it. I hope it’s going well — and that you’ve been making (and enjoying) your practice cakes! Be sure to let us know how it goes.
April: So nice of you to respond so quickly. I’m still at the I Don’t Know What I Don’t Know Stage so I’m reading everything I can get my hands on to fill in some of the gaps. It’s going to be a week or more until I’m ready to put the pedal to the metal and actually bake my first layer and I’m looking forward to the reward of tasting my experiment. Thank you s much for your support. Lynda
I offered to make my nephew’s wedding cake and am starting the process of what that will take. The wedding is three months plus away and I’m not quite sure where to go because every aspect of this will be new to me except the baking part, but you’ve set me straight on that. So thank you so much for the invaluable tips. I had a heating core which I had never used but will set it aside and pick up the flower nails thanks to your suggestion. So many excellent tips to help me. I sincerely appreciate each and every one of your suggestions and I know they will help me avoid many of the hazards I don’t even know are ahead of me.
Good luck, Lynda! For what it’s worth, I really had no idea where to begin, and my very initial reading left me more overwhelmed than reassured. But once we buckled down — and started the practice cakes — things like layers vs. tiers, dowels, and using consistent measures for each layer started to make much more sense. You’ll be great! Please keep us posted!
Wow!!! Thank you so much for this post. I’ve somehow landed a wedding cake job for my best fried and was starting to really sweat about it but this post gave me some confidence 🙂
How big were your layers? I saw they were two inches high but do you remember how wide they were? I’ve bought a set of pans that are 12,10,8, and 6 inches but the 12 looks huge!!! I’m hoping I can get away with using the 10, 8, and 6.
I’m sorry I missed your question, Katie — it may be too late now, but I’m almost certain we used 12, 10, and 8. And yes, the bottom tier was big! I hope your plans are coming together, and I’m so glad the post helped! Please let us know how it goes, and good luck!
Can you email me a recipe for your chocolate cake with chocolate buttercream frosting, with salted peanut butter frosting
At mason.collard@ymail.com
Hello everyone, I need your advice. I recently made a cake for a christening and it turned out perfect. However, the day after the christening (after it was exposed to the air), it went mouldy. It was hot, humid weather and was left out instead of refrigerated, but now I’m paranoid about mould. I should stress that on the day of the christening it was perfect. I’m making my nieces wedding cake and I need to freeze the layers before constructing them. I’m doing one chocolate cake with chocolate ganache filling, one vanilla with strawberry buttercream filling and one layer with vanilla cake and passionfruit and orange filling. I’ll be using passionfruit curd for that filling. I’m just terrified that once the layers are put together (2 – 3 days before the wedding) and covered in chocolate ganache, that the filling could go mouldy. I’ve always thought that it’s airtight once covered in ganache but if anyone has any advice regarding this subject, please let me know what I can do to avoid it. Thanks so much. x
Hi there! I was just wondering how many people this cake served? I am struggling to figure out portion sizes!
I so enjoyed this helpful information. I’ve baked several wedding cakes in the past but had never frozen them. I will try it this time. Your instructions and hints are very helpful. Thank you for sharing you experience with us.
Thanks, Paula! Let us know how your cake turns out!
How did you defrost frozen cake layers?
Hi, Kris, I’ve always heard you get the best results with thawing the layers in the fridge, still wrapped in the plastic wrap. I can’t remember if we actually did it that way, but that’s what I see most recommended, so I would go with that. I hope that helps!
Actually, Kris, looking back at a previous reply above, it looks like we thawed them at room temperature and assembled the cake layers still slightly cool. That said, given everything I’ve read, if I did this again, I would thaw them overnight in the fridge.