Fired Up With “Hotly Contested Election” Chili

OK. I’m tasked with stepping up to the plate for Food Fight this month, with the theme of “Presidential Favorites.” More specifically, as a shout out to the election, a candidate-inspired entry.

I’ve picked the 44th president, Mr. Barack Obama, as my inspiration. But … which way do I go with this? The Democratic mascot is the donkey. Er … that’s a solid no. Maybe something Hawaiian or Chicagoan, perhaps?

But after some Internet research, I came across a bajillion references (okay…a few references) to the fact that Obama’s favorite meal (to prep and eat!) is chili. I found several pics of the president at D.C.’s iconic Ben’s Chili Bowl,  and with the cold months rolling in, what better meal to tackle than a nice warm bowl of this American classic? Chicago style chili it is!

The Huffington Post actually has President Obama’s own chili recipe online, so I decided to use that as my launching point.

I’ll digress here, loyal reader, to share that I’ve been a bit of a food wimp until recently. Not being big on spicy food was among many faults. However, since meeting a hardcore (and all around fabulous) foodie who’s introduced me to a world of amazing foods, my spice fear has been abandoned. Thus, my intention is to spice this chili up, much like the heated race and the fairly salty debates. In fact, I considered naming it “DEFCON 1” chili to warn of impending nuclear heat,  but decided to keep it topical with “Hotly Contested Election” chili.

Much like the Democratic candidate, Obama’s family recipe is tailored to the masses:  very … mild. There are no crazy, over-the-top spicy ingredients in the version on HuffPo, so I’m going to throw in some fire to help add some to our candidates’– and eaters’ — bellies.

I’m also trying to keep my process to around an hour. If you search around, many recipes call for four or so hours of simmering, and I just don’t have that kind of time!

To top it all off, I’ve never made chili from scratch (in other words, I’ve always had some “canned” assistance).

So, here goes:

Once I had made and tried the chili, I realized that I’ve had this style before — and that I actually prefer a more tomato-pasty type of chili.

Ingredients for the chili

I had considered adding tomato paste to this recipe to thicken it up, but decided against it, since that steers the dish more towards Texas than Chicago.

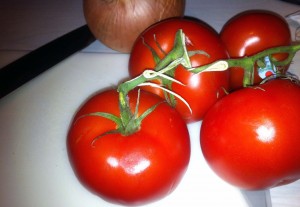
I start out by cutting up 5 tomatoes and dropped all that in a pot, along with dried oregano and  basil, chili powder, hot sauce, Worcestershire sauce, cumin, turmeric and a sizable jalapeno pepper.

I also chopped up a large onion, garlic and a green and red pepper (as opposed to the single green pepper in the President’s version), and start sauteeing with some olive oil. Once that’s been cooking a bit, I add in a little more than 2 pounds of ground turkey meat (I’m using turkey instead of beef, since I’m trying to keep this healthier) and brown it up.

Now, I’ll mention here that the recipe called for the veggies to be “chopped,” but I cut them all down pretty small — probably dicing more than chopping. But I’m not a big fan of giant veggie chunks in my chili, so modify  as you will.

Once the meat is close to browned, I start heating up the tomatoes and spices. When that’s cooking, I add in the meat, peppers and onions, two cans of kidney beans and the red wine vinegar.
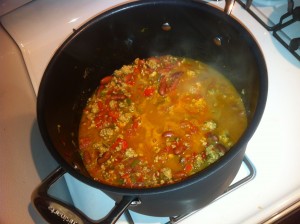
Let it Cook While all that simmers, I heat up some water and cook some elbow macaroni (apparently, Chicago style chili is served on some pasta).

Well, I’ll tell you … this chili tastes good. It has some heat, but you won’t need ObamaCare to rescue you from the spiciness — I could even have brought it up a lot more. But there is something missing — that stick-to-your-ribs chili heft I mentioned just isn’t there. Now, if I recall, that’s just in keeping with this style of chili (or maybe that’s just how the Obamas like it). But despite the five tomatoes, there’s just no deep tomato taste. I think if I had used regular ground beef, that would have helped with some of the flavor.

That said, all in all, it’s pretty darn good for my first chili outing. If I were to take another swing at this, I might add tomato paste to thicken things up, and maybe a splash more hot sauce.

Well, this pot ‘o chili may not be the candidate with the most personality, but I’m pretty confident you won’t find an “empty chair” at the dinner table when you serve this.  This chili has got enough fire in the belly to give my Food Fight opponent a run for her money.

Hotly Contested Election Chili
Adapted from the Obama Family Chili recipe
8 servings

Several cloves of garlic, chopped (I used 2)
1 large sweet onion, chopped
1 green pepper, chopped
1 red pepper, chopped
1 jalapeno pepper, finely chopped
1 tablespoon olive oil
2 pounds ground turkey or beef
1/4 teaspoon ground cumin
1/2 teaspoon ground oregano
1/4 teaspoon ground turmeric
1/4 teaspoon ground basil
1 tablespoon chili powder
2 tablespoons of hot sauce
A splash (2 or 3 tablespoons) of Worcestershire sauce
Salt and pepper to taste
3 tablespoons red wine vinegar
Several tomatoes, depending on size (I used 5), chopped
2 15.5 oz cans red kidney beans 

Saute the onions, green and red pepper and garlic in olive oil over medium heat until they’re soft.

Add the ground turkey or hamburger to the pan and brown the meat, stirring occasionally.

In a large pot over low heat, combine the tomatoes, jalapeno and spices and bring to a simmer. Let the tomatoes cook down a bit, then add in the ground meat/pepper/onion mixture. Throw the kidney beans into the mix, add in the red wine vinegar, and let it all simmer at low to medium heat, stirring occasionally.

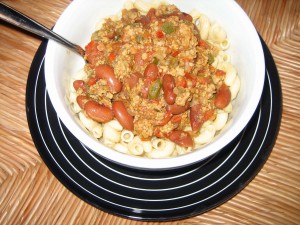
I served the chili over elbow macaroni, but you can also serve over rice. Try topping it with some shredded cheese. Green onions and/or sour cream would taste great, too.

Tagged with: , , , , , , , , , , ,
Posted in In The Blue Corner

Collective Quiche Goes Pan-Latin

Collaborative meals with friends are always a good idea. Everyone gravitates toward the kitchen at social gatherings anyway — why not use the time cooking something tasty together?

This week, Sarah and I tackled the stone soup idea for our Lunch Box “Food Fight.” If the concept of stone soup is unfamiliar, it essentially involves inviting friends to each contribute ingredients to a dish you prepare together.

Sarah has soup covered, so I had to dream up another dish conducive to collective effort. I decided turning lunch into brunch was the answer. Quiche, in particular, is a “kitchen sink” standby at my house. With a crust, four eggs and ¾ cup of milk or half-and-half, you have a perfect foundation for just about any other odds and ends you have in the fridge.

And while “brunch box” felt kind of like cheating, I’m in the clear! Because by the time we wrapped up the prep and baking at our little gathering, it was quite legitimately lunch time.

Time to tackle stone soup’s second challenge: what to ask everyone to bring? Not knowing what you’re going to get is half the fun, but you don’t want to end up with nothing but bell peppers, either.

Ultimately, I realized something interesting about my invitees: Barbara, Luis and Shazia are all “hyphens” — Dominican-American, Mexican-American and Pakistani-American, respectively. Problem solved! I asked each of my cooking compatriots to bring an ingredient or two inspired by their parents’ homelands.

plantains and chorizoSadly, Shazia, our Subcontinental ambassador, came down with a bug that kept her at home. But we soldiered forth, without the masala and potatoes she was planning to bring along.

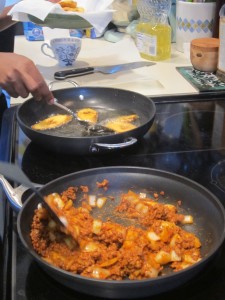
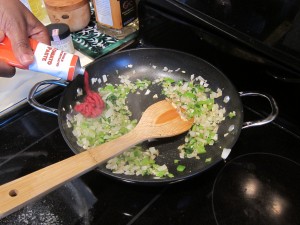
Barbara brought a medium-ripe plantain that she sliced, fried and drained on paper towels (while we chowed down on the scones she brought to tide us over). Paired with a quick sofrito she created with garlic, an onion, a green pepper, cumin and tomato paste — all from Casa de April — we quickly whipped up a tasty Dominican quiche.

Luis also outdid himself, with soy chorizo (could use the real deal, of course), an onion, queso fresco and the star ingredient: dried red chilies, which he steeped in hot water and then food processed into a liquid-y paste (more on that process in the recipe below).

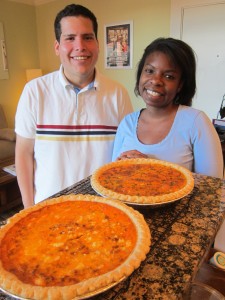
We chopped, we fried, we sautéed, we blended — and baked up two delicious Latin-inspired quiches that would make our mothers proud.

And the best part? My lovely friends left me with two delicious slices for my lunch box.

Plantain And Sofrito Collaborative Quiche

Makes one 9-inch quiche

One prepared or homemade 9-inch pie crust
One large, medium-ripe plantain (medium-brown, but not too soft and blackened), sliced
Vegetable oil, for frying (you’ll need about 1 inch of oil in your pan)
1/4 cup  sweet onion, diced
3 garlic cloves, chopped finely
1/2 green bell pepper, diced
2 tablespoons tomato paste (or substitute one large tomato, seeded and diced)
1 teaspoon ground cumin
1/4 cup chopped cilantro
4 eggs
3/4 cup half-and-half or milk
salt and pepper to taste

Fry the plantains: Heat a good inch or two of oil in a pan, drop in the plantains, and fry, turning once, until golden brown, about 3 to 4  minutes on each side. Remove with a slotted spoon and drain on paper towels.

Make the sofrito:  Heat about 2 tablespoons of oil in a pan. Sauté the onions, garlic and bell pepper until they start to soften. Add the tomato paste and cumin, stir, and cook till the veggies are tender, about 5 minutes more. Take off the heat, throw in the chopped cilantro, season with salt and pepper and let cool slightly.

Assemble the quiche: Beat eggs and milk together in a large bowl. When the plantains and sofrito are no longer hot (i.e., cool enough to avoid curdling the eggs), stir everything together, season with salt and pepper and pour into the pie crust.

Bake the quiche in a 375-degree oven for about 40 minutes, or until the center is set.

Chorizo Chili Collaborative Quiche

Some useful tips from Luis:

  • Make sure you use fresh Mexican-style chorizo, not the dried Spanish variety
  • We used queso fresco. For a saltier cheese, try crumbling some Mexican panela cheese. Like queso fresco, queso panela is not a melting cheese. For some melting action, try queso asadero or Oaxacan-style Mexican cheese.
  • Dried chile de árbol is a bright red, slender pepper that’s about 2-3 inches long. It packs more heat than a serrano pepper but less than a habanero pepper. If you can’t find chile de árbol, you can use dried cayenne pepper powder to taste.
  • To lessen the heat, remove seeds from chiles.

Makes one 9-inch quiche

One prepared or homemade 9-inch pie crust
3 to 5 dried chili de arbol chilies (see tips above)
10-ounce package soy chorizo, like Cacique brand (see tips above)
1/4 cup sweet onion, diced
About 1/2 cup crumbled queso fresco
4 eggs
3/4 cup milk or half-and-half
Salt and pepper to taste

Prepare the chilies: To rehydrate the dried chiles, boil enough water to cover and remove from heat. Add chiles to water and let them reconstitute, 5-10 minutes. Place chiles and some of the liquid (start with about 3 tablespoons) in a blender or food processor and blend. (Don’t breathe too deeply — the chili dust can get you!) Add more water, if needed, until you have a slightly watery paste (if it’s too watery, you can cook the extra liquid off once you add it to the pan).

Prepare the chorizo: Add the onion and soy chorizo to a fry pan and sauté over medium-high heat for about 8 minutes, or until the onion is cooked and the chorizo and sauce look nicely incorporated. Add the chili mix to the pan, and sauté about 5 more minutes to meld the flavors and cook the chilies. If your chili mixture is watery, let the liquid cook off. Set it all aside and let cool slightly (you don’t want the mixture to cook the eggs when everything is combined).

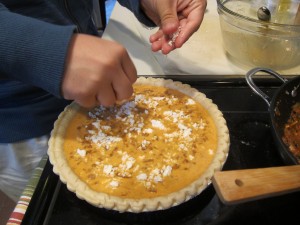
Assemble the quiche: Spread about half the queso fresco in the bottom of the pie crust. Beat eggs and milk together in a large bowl. When the chorizo mixture is cool enough to avoid curdling the eggs, stir it all together, season with salt and pepper, and pour into the pie crust. Crumble the last of the queso fresco on top, and bake in a 375-degree oven for about 40 minutes, or until the center is set.

Tagged with: , , , , , , , , , ,
Posted in In The Blue Corner

I See Your Veggies, And Raise You Cheese

When most of the world is reaching for fruit, I’m going green. Don’t get me wrong; I absolutely adore a good doughnut peach … and nectarines … and berries (oh, my!). At heart, though, I’m a veggie girl. You just keep sucking back your fruit smoothies, while I toss crisp, frilly kale, juicy cucumbers and sweet carrots into my Vitamix.
So it’s natural for me to turn to veggies when brainstorming grilled sides. But that’s just not the kind of thinking that wins a competition now, is it?

What does? Cheese. Sweet, melty oh-so-delicious cheese.

Sarah, you’re in trouble, sister.

Cheese is my other downfall (actually, there’s quite a list, but I digress), and one that I take quite seriously. A while back, I began hitting up the leftover cuts of cheese at my local Whole Foods. Don’t know what this is? Good — more for me.

OK, OK, I’ll tell you. They’re like the cheese equivalent of fabric remnants. When the store nears the end of a rind of delectable dairy goodness, the leftover odds and ends are wrapped up and sold for cheap. It’s a great way to try a brie that might be a bit too stinky for your palate, before forking over $15 for a hefty hunk. That odds-and-ends basket is where I discovered the marvels of a world tour of cheeses, like the Italian Sottocenere al Tartufo. I can compare the experience of eating it to only one thing.

Yes, it’s that good.

So naturally, I was game when Ina, a young German intern who slept on my couch for three weeks (Airbnb … a long story for another time) suggested we grill feta. Mind you, I couldn’t wrap my head around exactly how this would be accomplished, but I was willing to try. As it turned out, Ina’s recipe changed my life. Well, that may be a bit dramatic … but I now firmly believe I know Germany’s best kept secret: Ina’s Grilled Feta.

Feta. Olive oil. Herbs. Wrap in foil. Put on grill. Perfection.

A few months later, Sara, another lovely German, graced my couch for a few weeks. When her boyfriend joined her midway through the visit, I suggested an impromptu dinner party. Can you guess what she suggested we make? Yup, grilled feta.

This is a bloody conspiracy.

And although her version of this apparent German staple was a little different — adding chopped zucchini, mushrooms and tomatoes — it was again perfection. It really was something magical, which I will now share with you.

Boosted by the veggies, Sara’s recipe lends itself better to a true side or a meal in itself, so we’ll err on the side of world peace and compromise between the two versions. It’s a guaranteed hit at any backyard BBQ, and it’s super easy to make in advance and bring along. I added in a little grilled pita for good measure, since I know Sarah’s grilling leeks and I figured I needed to raise the bar a bit further!

Play with this. Make it your own. Experiment with your favorite ingredients and spices. Most of all, enjoy — and leave comments about the variations you try to give other Eaters some ideas.


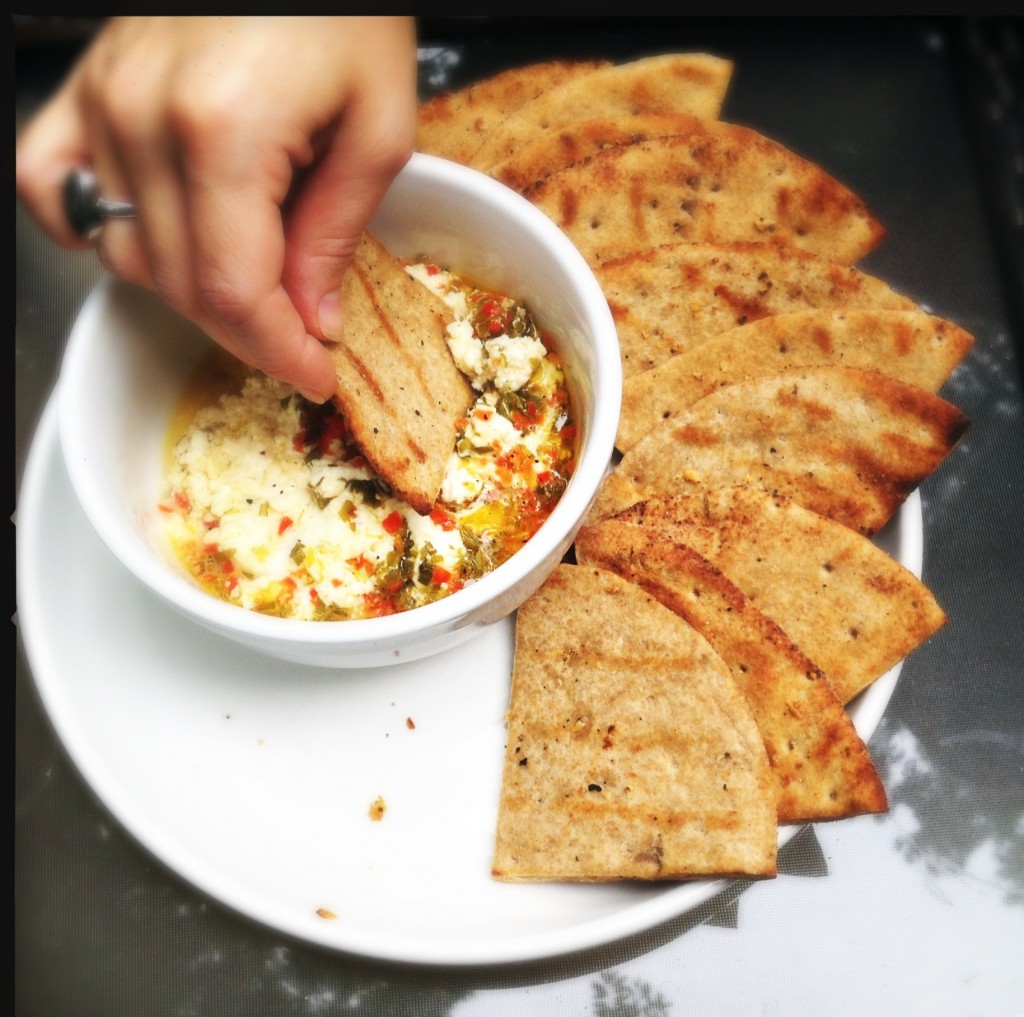
Grilled Feta with Pita Wedges

Note:  Use the best feta you can afford; lower-quality or “light” versions are more likely to separate on the grill.

For the pita:

4 pita, quartered (I suggest whole grain)
1/4 cup olive oil
2 gloves garlic, minced
Salt and pepper

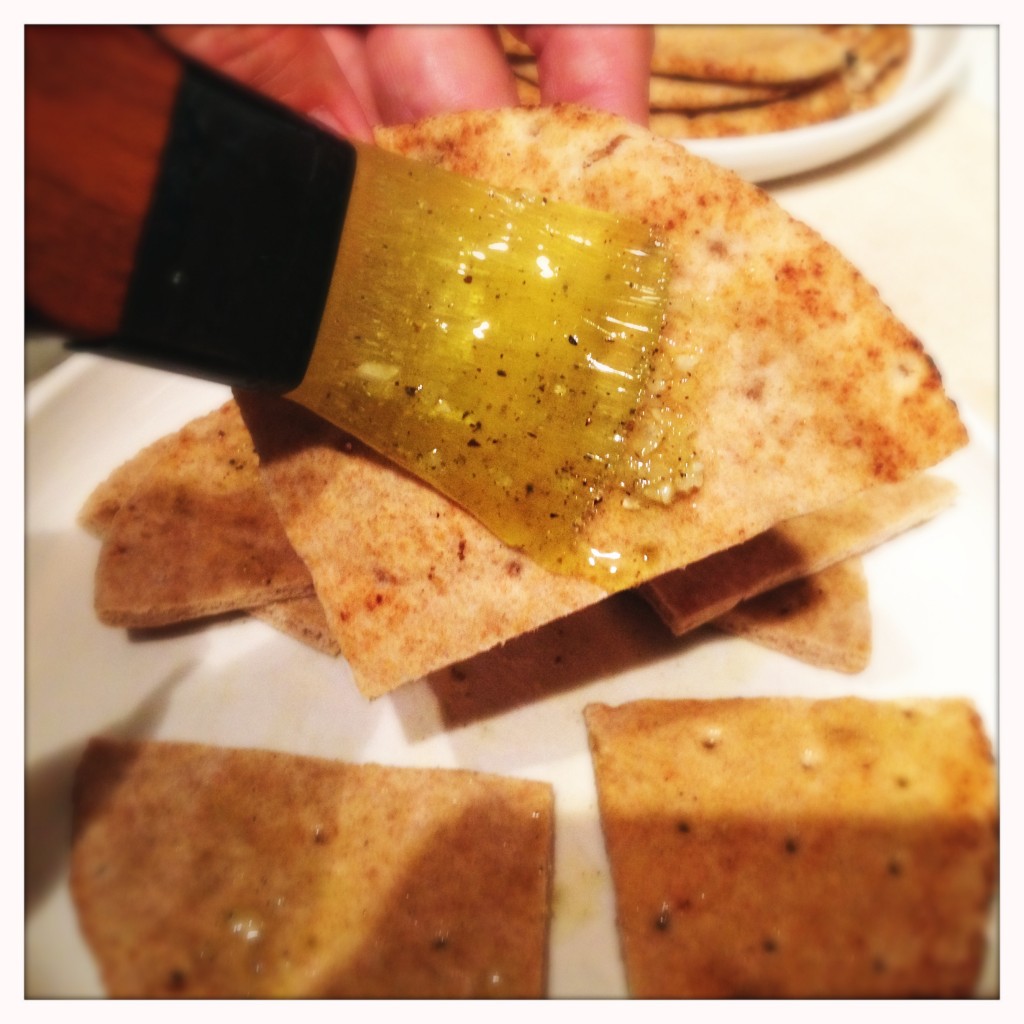
Pour olive oil into a small bowl. Mince garlic, then smash with the flat side of the knife across your cutting board (this helps release the garlic oils and thus the flavor), add to bowl and whisk. Salt and pepper to taste. Brush both sides of the pita with the oil. Grill on low heat, turning once, until it’s golden brown with some char marks.

For the cheese:

Olive oil
Block of feta, cut into 3/4 inch thick slices (I used a RBGH-free variety from Whole Foods)
1/4 cup red pepper, minced
1/4 cup green onions, minced
Herbes de Provence
Salt  and pepper

Double up the aluminum foil, crossing one piece over the other. Drizzle some olive oil in the bottom and put two slices of feta side by side in the middle. Drizzle with more olive oil, sprinkle vegetables over the top and add herbs. Salt and pepper to taste. Wrap up tightly, leaving apocket of space on top of the cheese.

Put on the grill on a lower setting, or not on the direct heat, for about ten minutes. You can open it up to check it; it should look soft and melty, like clouds.

If you are cooking this as a side with larger-cut veggies, it may take a little longer, but can go on the grill along with your main course. If making as an appetizer, grill the pita wedges while the cheese is cooking and pull both off the grill at about the same time.

Posted in In The Blue Corner
photo credit to Aaron Otis Photography 2014


July
Watermelon is the perfect summer food. It hydrates, it cools, it's sweet and juicy. We have some great ideas for your table, including a salad, ceviche cups, popsicles and cocktails. Get ready to beat the heat with us!